Quick answer
The biggest challenge when photographing Las Vegas from the High Roller is not height or motion. It is reflection from the cabin glass.
Keep your phone or camera as close to the glass as practical, block stray cabin light with your hand or lens hood, keep flash off, and use a faster shutter speed than you would for a normal night cityscape.
For phones, the standard 1x camera usually gives the cleanest results. Night Mode can help, but very long exposures can blur because the cabin is moving.
For interchangeable-lens cameras, a good starting point at night is a wide aperture, a shutter speed around 1/125 sec or faster, and enough ISO to expose the city correctly. In daylight, lower ISO and an aperture around f/5.6 to f/8 work well.
The most versatile photography window is around sunset, when you can capture both the valley and the illuminated Strip during one approximately 30-minute rotation.
Table of Contents
Why High Roller photography is different
The High Roller rises to 550 feet and takes roughly 30 minutes to complete a rotation.
You are shooting through curved cabin glass while the wheel is moving slowly and the lighting around you is constantly changing.
That creates four photographic problems:
- reflections from cabin lights and other passengers
- smudges and fingerprints on the glass
- bright signs next to very dark areas at night
- motion blur if you use exposures that are too long
The good news is that the wheel moves slowly enough for excellent handheld photography if you set up correctly.
The most important tip: control reflections
Reflection is the problem that ruins the most High Roller photos.
At night, the cabin can be bright enough for lights, clothing and faces behind you to appear in the window.
For a cleaner photograph:
- Move your lens or phone close to the glass.
- Shade the area around the lens with your hand, jacket sleeve or lens hood.
- Keep the flash off.
- Avoid standing directly under a bright cabin light.
- Check the image after the first few shots rather than discovering reflections at the end of the ride.
Do not press expensive camera glass hard against the window. A rubber lens hood is useful because it can sit close to the glass while protecting the front element and helping block reflections.
For a phone, holding the camera module close to the window and shielding it with your free hand is usually enough.
Best smartphone settings during the day
Modern phones need very little manual adjustment in daylight.
Use the 1x lens first
The main camera normally has the best sensor and produces better image quality than the ultra-wide or digital zoom lenses.
Use ultra-wide only when you genuinely need more of the cabin or skyline in the frame.
Use 2x or 3x optical zoom if your phone has a dedicated telephoto camera and you want to isolate a landmark such as The Sphere or the Eiffel Tower replica.
Leave HDR on
Las Vegas has bright skies, reflective buildings and deep shadows in the same scene.
HDR helps preserve detail in both the sky and darker parts of the Strip.
Tap on the city, not the brightest sky
If your phone exposes for the sky, buildings can become too dark.
Tap on the mid-distance skyline, then adjust the exposure slightly downward if bright highlights begin to clip.
Avoid excessive digital zoom
It is usually better to take a clean wide image and crop later than to use heavy digital zoom through glass.
Best camera settings during the day
For a DSLR or mirrorless camera, start with:
- aperture: f/5.6 to f/8
- ISO: 100 to 400
- shutter speed: 1/250 sec or faster when light allows
- stabilization: on, if your lens or camera supports it
- file format: RAW + JPEG if you plan to edit later
A slightly faster shutter speed gives you more protection against movement from your hands, other passengers and the slowly rotating cabin.
If the weather is hazy, do not expect camera settings alone to create a perfectly clear mountain view. Atmospheric haze is common in Las Vegas.
Best smartphone settings at night
Night photography is where most people struggle.
Keep flash off
Flash will illuminate the cabin glass and nearby passengers rather than the Strip outside.
Use Night Mode carefully
Phone Night Mode can produce excellent results, but it works by collecting light over a longer period.
If the exposure becomes several seconds long, movement from the cabin or your hands can soften city lights.
Brace the phone near the glass and keep the exposure as short as the phone allows while still producing a usable image.
If signs begin turning into streaks or buildings look soft, switch back to the normal camera mode or shorten Night Mode.
Lower the exposure slightly
Las Vegas has extremely bright signs surrounded by dark areas.
A slightly darker exposure often keeps neon signs from becoming white blobs and gives you more color to work with later.
Do not judge everything from the phone screen
The cabin is dark and your phone display can make an image look brighter than it really is.
Take a few variations rather than relying on one exposure.
Best DSLR or mirrorless settings at night
There is no single perfect setting because brightness changes constantly around the Strip.
A useful starting point is:
- aperture: f/2.8 to f/4
- shutter speed: 1/125 sec or faster
- ISO: 1600 to 6400, depending on your camera
- stabilization: on
- autofocus: single-point AF on a bright building or sign
- file format: RAW
The important change from normal cityscape photography is the shutter speed.
A tripod-style several-second exposure is not ideal from a moving observation wheel. It may work occasionally, but it is much less reliable than using a faster shutter speed and allowing ISO to rise.
Modern cameras handle high ISO better than many photographers expect, and a slightly noisy sharp photograph is usually preferable to a perfectly clean blurred one.
Should you bring a tripod?
For most visitors, no.
The cabin itself is moving, space may be shared with other passengers, and a tripod does not solve the reflection problem.
A small phone grip or wrist strap is more useful for most people.
If professional equipment or a particular support system is essential to your shoot, check current attraction rules before arriving rather than assuming it will be accepted.
Best side of the cabin for photos
There is no single side you need to defend for the entire ride.
The cabin gives you 360-degree views and your perspective changes as the wheel rotates.
When occupancy allows, move around gradually and look for different compositions rather than taking 50 versions of the same skyline.
For the wider landmark breakdown, see Views from the High Roller.
Best High Roller shots to plan
The Strip panorama
A wide view down Las Vegas Boulevard is the classic High Roller photograph.
Shoot both horizontal and vertical frames. Vertical compositions work especially well when you want to show the height of the cabin above the city.
The Sphere
The Sphere is one of the easiest landmarks to isolate after dark because its exterior is so bright and distinctive.
Use the main camera first, then try optical telephoto if your phone or camera has it.
Paris Las Vegas and the Eiffel Tower
The Eiffel Tower replica gives the Strip an instantly recognizable shape and works well in medium telephoto compositions.
The mountains in daylight
During the day, turn away from the Strip as well.
The Spring Mountains and desert landscape help show that Las Vegas is a city surrounded by a much larger valley.
The Promenade below
Looking down at The LINQ Promenade creates a completely different image from the normal skyline shot.
The lines of the pedestrian street, restaurants and people become much more geometric as you climb.
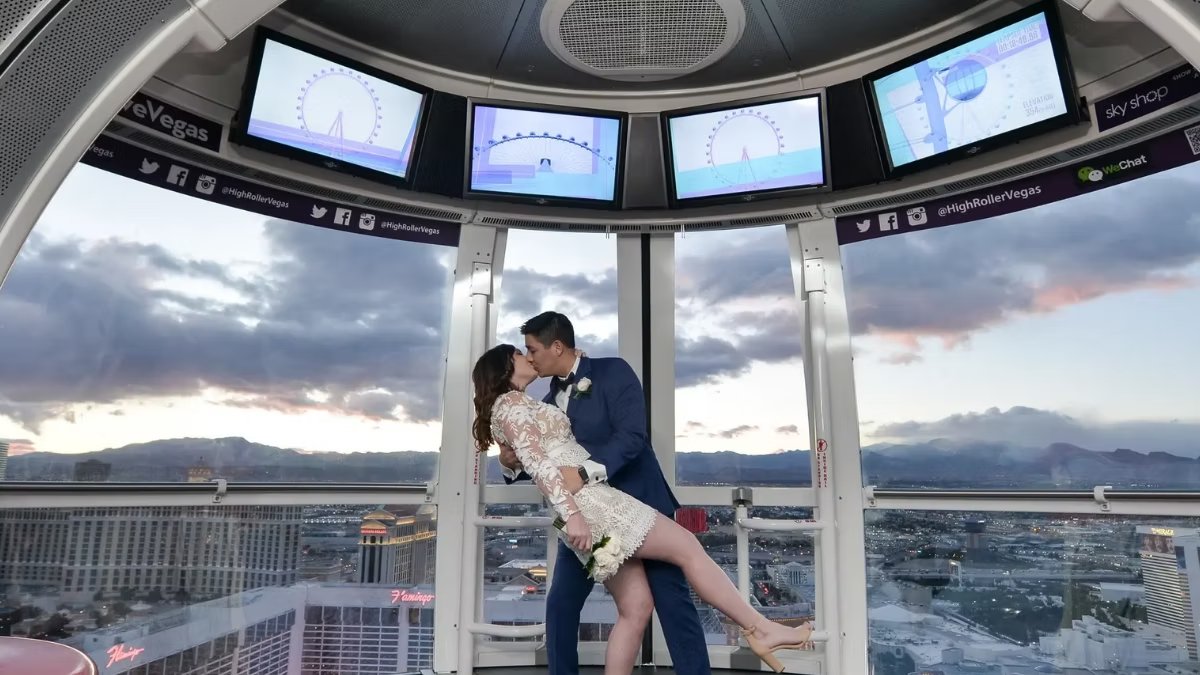
Cabin portraits
One of the best photographs is often not the city by itself.
Place your companion near the glass with the skyline behind them. At night, expose for the face carefully without using flash, or use the ambient cabin light as part of the image.
Silhouettes can work particularly well during sunset.
Best time for High Roller photography
Midday
Best for:
- clear architectural detail
- mountains and desert
- lower ISO
- sharp phone photos
The trade-off is harder overhead light and less atmosphere.
Late afternoon
Light becomes warmer and shadows become more useful for texture.
This is a good compromise if you want daytime detail without the harshest midday look.
Sunset
Sunset is the most versatile period because the light can change dramatically during one rotation.
You may begin with visible mountains and finish with illuminated hotels and signs.
Do not arrive at the published sunset time expecting to be at 550 feet immediately. You still need to enter, queue and board.
See High Roller opening hours and best time to visit before planning a sunset shoot.
Blue hour
The short period after sunset can be excellent because the sky still has color while Las Vegas lights are already prominent.
It is often easier to photograph than full darkness because the contrast between the city and sky is lower.
Full night
Best for:
- neon
- The Sphere
- illuminated hotel facades
- traffic trails in wider scenes
Night gives you the strongest Las Vegas atmosphere but requires the most care with reflections and exposure.
For the visual difference, see High Roller Day vs Night.
What to bring
You do not need a camera bag full of equipment.
Useful items are:
- a fully charged phone or camera
- a clean microfiber cloth
- a lens hood if using an interchangeable-lens camera
- a wrist strap or secure camera strap
- a small power bank for your phone
- a spare battery if you are shooting heavily
Avoid carrying equipment you will spend the whole ride changing.
The rotation is only about 30 minutes, and the view keeps changing while you work.
Common mistakes to avoid
Using flash through glass
This creates glare and reflections rather than lighting the city.
Using a several-second shutter speed without checking sharpness
The cabin moves. Long exposures can turn lights into streaks.
Photographing only the Strip
The mountains, valley, Promenade and cabin interior give you much more variety.
Staying on one side for the entire ride
The changing viewpoint is one of the High Roller’s strengths.
Overusing digital zoom
Crop a clean file later when possible.
Forgetting reflections in portraits
Dark clothing and careful positioning can help prevent your own reflection from appearing across the subject.
Spending the whole ride looking at a screen
Take your photographs, but give yourself time to look at the view directly. Thirty minutes goes quickly.
Frequently asked questions
Can I bring a camera on the High Roller?
Personal cameras and smartphones are commonly used by visitors. If you are bringing professional equipment, lighting, large supports or anything that could affect other guests, check the attraction’s current rules before your visit.
What is the best phone lens to use?
Start with the main 1x camera. It normally provides the best low-light quality. Use optical telephoto for individual landmarks and ultra-wide only when you need the wider field of view.
Should I use Night Mode?
Yes, but watch the exposure length. If several-second exposures create blur, use a shorter Night Mode exposure or the normal camera mode.
What is the best camera setting at night?
Start around f/2.8-f/4, 1/125 sec or faster and ISO 1600-6400. Adjust for your camera and the brightness of the scene.
Can I use flash?
Flash is usually counterproductive because you are photographing through glass. Keep it off for skyline shots.
What is the best time for photographs?
Sunset into blue hour gives the widest variety in one ride. Daylight is better for mountains and detail; full night is better for neon.
Can I photograph the Bellagio fountains from the High Roller?
You can see the Bellagio area from the wheel, but the wheel and fountain schedules are independent. Treat an active fountain show from the cabin as a bonus rather than something you can guarantee.
